Create New Count Sheet
Log on to techemetapp.com.
Select Create New Count Sheet from the Main Menu.
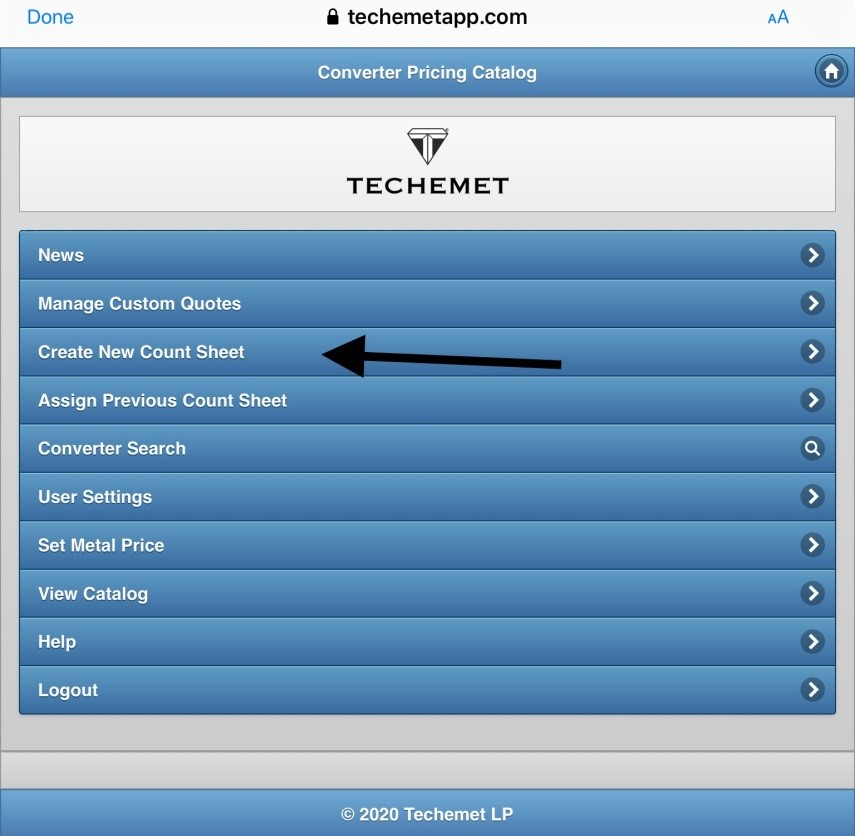
The Open New Count Sheet page appears.
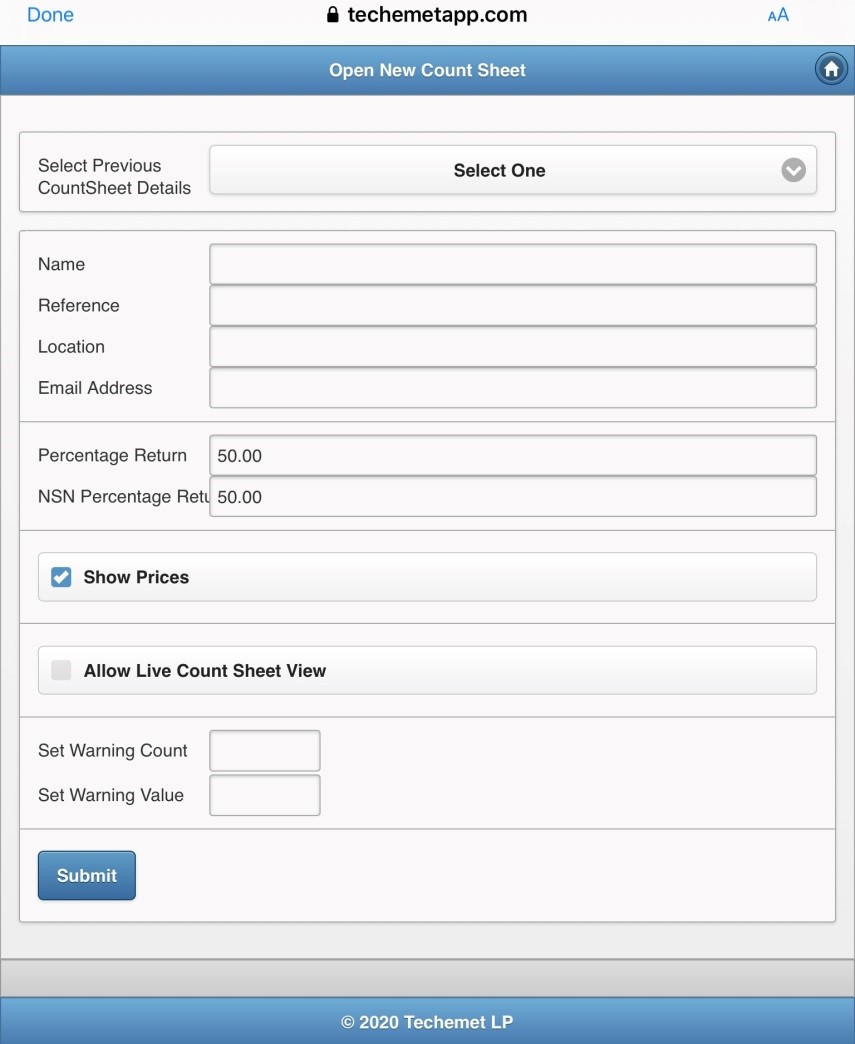
Select Previous Count Sheet Details
Select details previous entered from the dropdown menu OR if this is a new customer or has different details to previous Count Sheets, please see below.
Name
Type the name of the Count Sheet that you are creating.
Reference
The reference associated with this Count Sheet (if any).
Location
The address of the seller / where you are purchasing the units from.
Email Address
The email address of the seller.
Percentage Return
% Return – This refers to how much money you hope to make on this converter. The higher the percentage return, the less you make and the lower the percentage return, the more money you make.
The percentage return is changed by typing the number in the field. The range is from 50 % to 100 %.
EXAMPLE
• If the terms for your company are at 93 % and the % return is set to 80, the converter is purchased at an additional profit of 13 %.
• If the terms for your company are at 93 % and the % percentage return is set to 95 %, the converter is purchased at a LOSS of 2%
NSN % Return
• The principle in NSN % return is the same as above.
• The reason it is separate, is to allow the user to set a different return for NSN converters. NSN converters carry more risk as it is more difficult to ascertain their value.
Percentage Return Factor
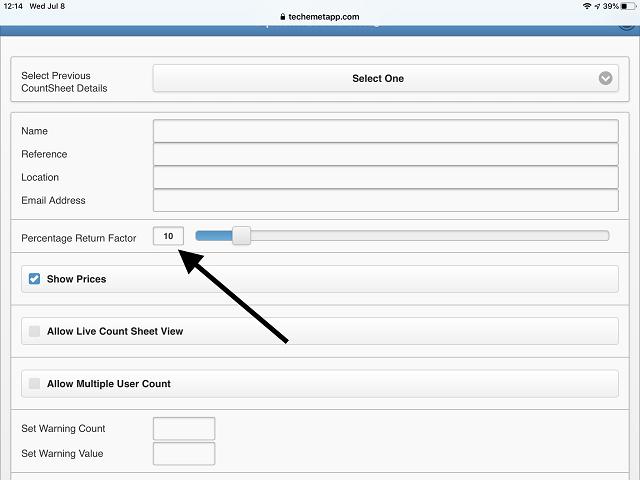
The percentage return factor drops the percentage return on the converter by a factor of between 1 and 90.
The percentage return factor takes the price that you pay for the converter and lowers it by a factor. The higher the factor, the less you pay for the converter and the higher the profit on the converter.
Once the percentage return factor is set on a Count Sheet it remains in effect for all searches until a new Count Sheet is opened and the % return factor is changed there or until the user logs out of the account and logs back in again.
Users are either set up to buy by Percentage Return OR using the Percentage Return Factor.
The percentage return and the percentage return factors mentioned above are determined by the controller of the account. The controller also determines whether the user is able to change these figures. For more information on this please contact your controller or your Techemet buyer.
Show Prices
If this is selected it is possible to see the price of the converter when you search.
If it is not selected, the price will only be shown on the count sheet, after the converter has been added.
Allow Live Count Sheet View
When using the Techemet App to count converters, one or more people can view the Count Sheet live, during the count. To do this, check the “Allow Live Count Sheet View” option when opening the count sheet.
If Live Count Sheet View is selected an additional field appears.
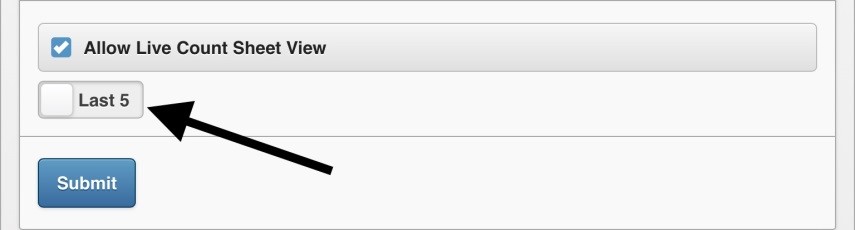
The options are Last 5 or All.
Tap on the button to toggle between the options.
Last 5, means that the viewer of the Count Sheet, can only see the last 5 converters added to this sheet.
All, allows the viewer to see ALL the converters added.
For more information on the Live Count Sheet please refer to the Allow Live Count Sheet View section of this document.
Set Warning
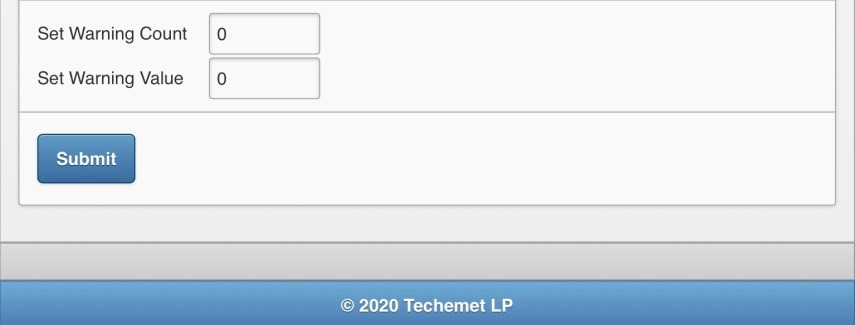
The Set Warning fields allow the user to set a warning once a count and/or value is reached.
Once set, a warning will show once you have reached the limit.
To set the warning (s), tap on the field next to each warning and enter a number.
If you do not require a warning limit, leave this field blank or enter zero.
The warnings can be used individually or combined. If you enter a warning for both Count and Value, the warning will be shown when any one is reached.
Tap Submit and the Count Sheet is created and appears on the Main Menu.
Editing Or Deleting A Count Sheet
Select the Count Sheet you opened, from the Main Menu.
The Count Sheet appears.
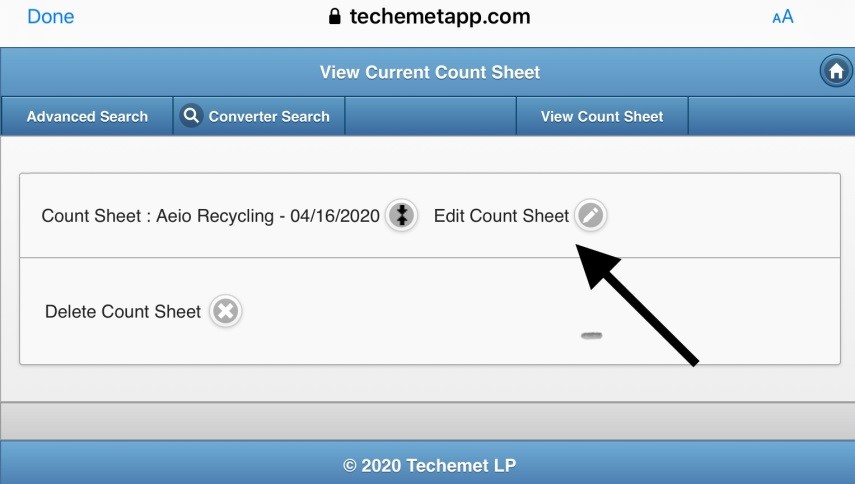
The following can be performed on this screen:
• Edit Count Sheet
• Delete Count Sheet
To Edit Count Sheet:
• Tap Edit Count Sheet.
• The Edit Count Sheet pop up window appears.
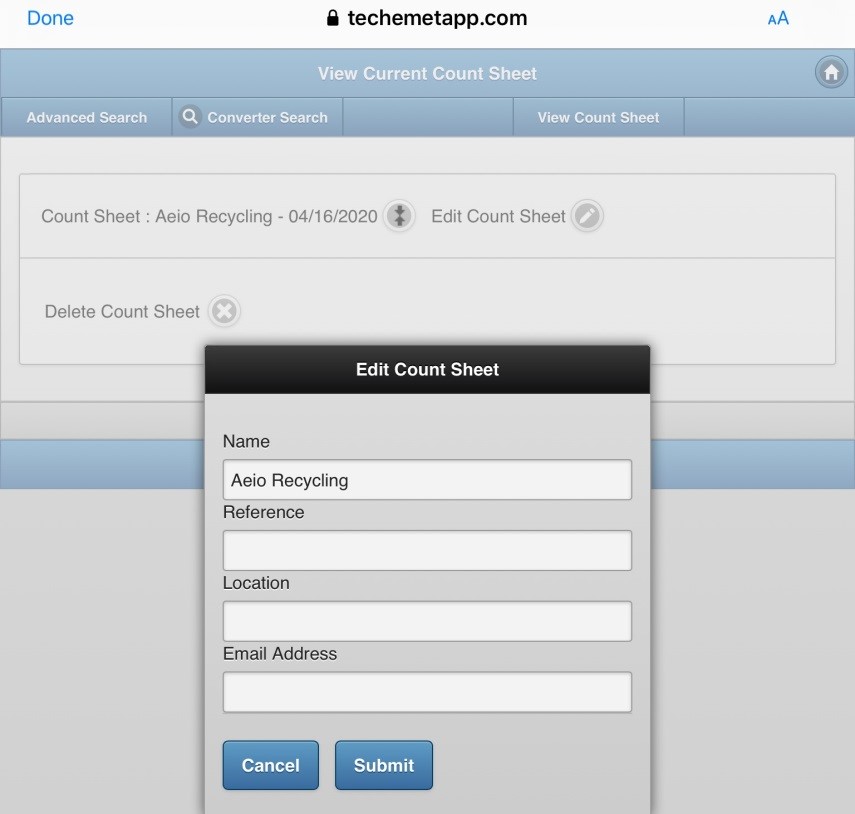
Change the fields that you need to change.
Tap Submit.
The View Current Main Menu page appears.
To Delete Count Sheet
• Tap the Delete Count Sheet button.
• The Delete Count Sheet pop-up window appears.
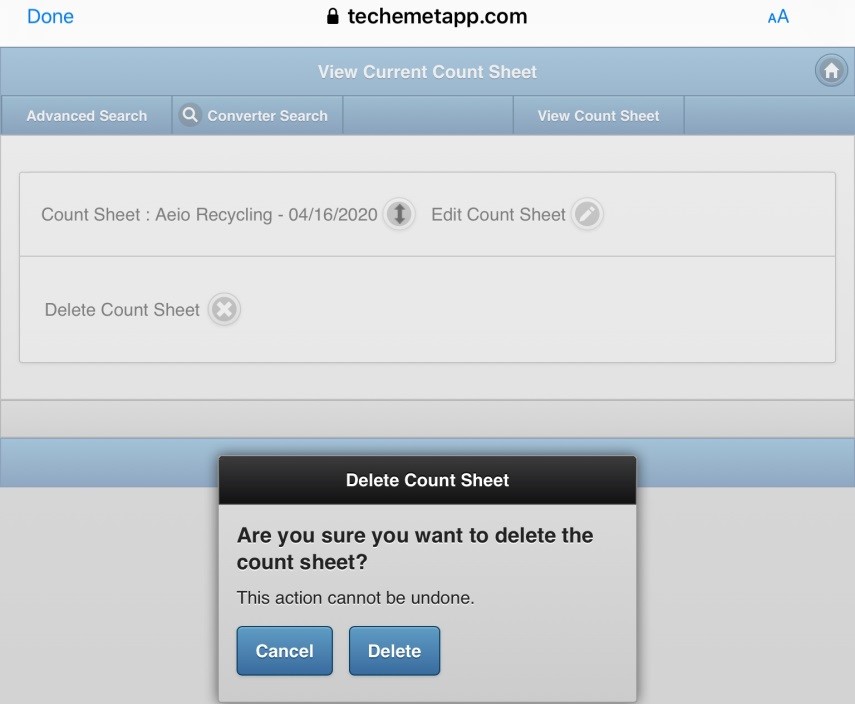
• Tap Cancel to cancel the action or tap Delete to delete the Count Sheet. Once it is deleted the Count Sheet cannot be retrieved.
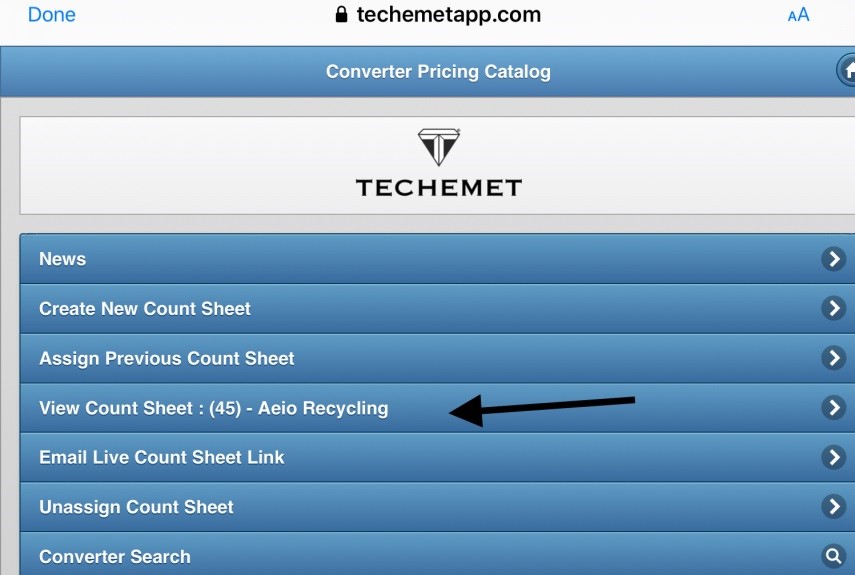
Adding Converters To The Count Sheet
The Count Sheet that was created appears in the Main Menu.
Tap on View Count Sheet.
There is also an Email Live Count Sheet Link option on the Main Menu, if you want to email the link to whoever would like to view the Count Sheet. Please refer to the Live Count Sheet section of this document for more information.

The View Current Count Sheet page appears.
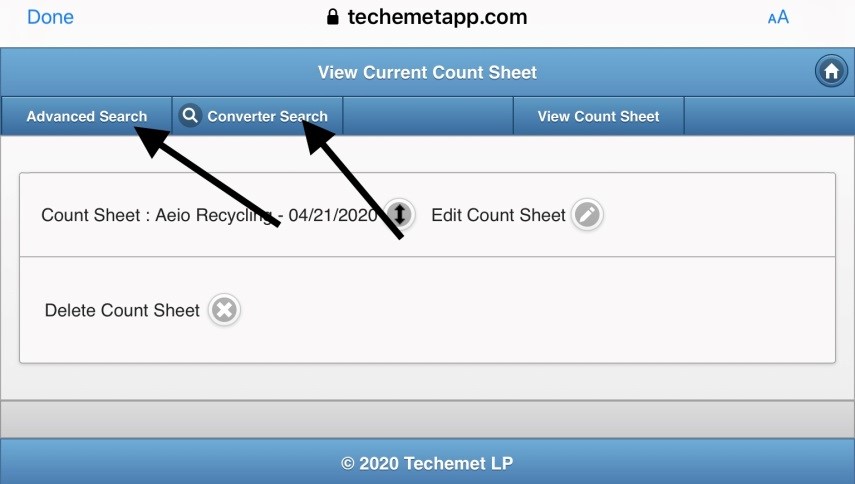
Converters can be added to the Count Sheet using either the Advanced Search tab or the Converter Search tab.
Advanced Search
The Advanced Search feature allows you to search for a converter using a number of search criteria. For more information on this feature please refer to the Advanced Search help file under the Help section.
To add converters using this feature, tap Advanced Search.
The Advanced Search page appears.
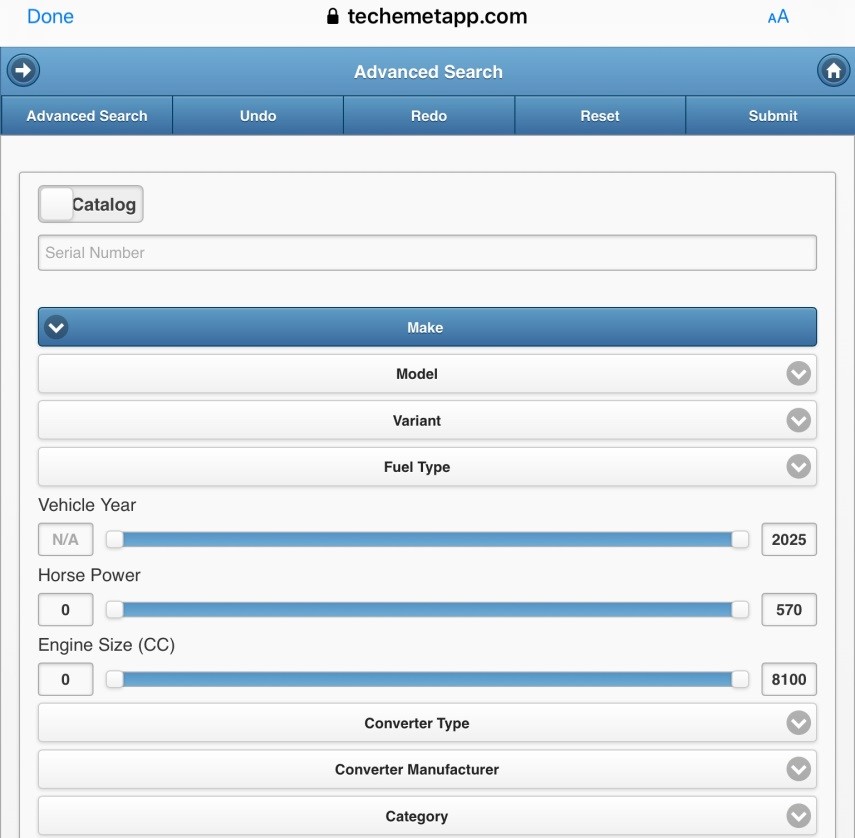
Select the search criteria.
Tap Submit.
The Search result page appears.
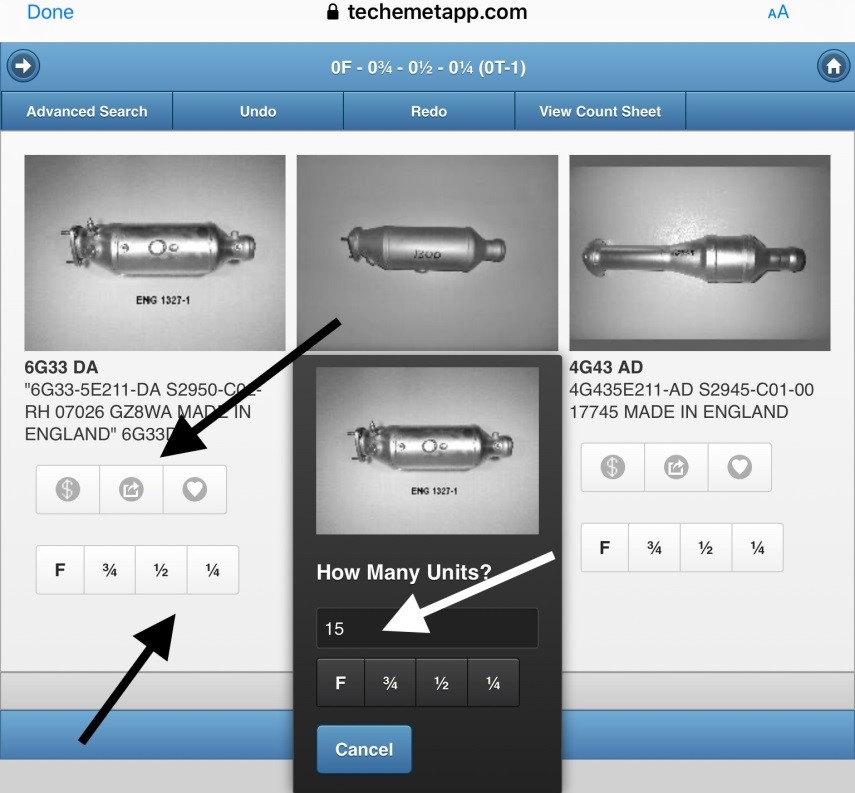
There are 2 ways to add converters to the count sheet:
1. Tap the F, ¾, ½, 1/4 to add one converter to the Count Sheet.
2. Tap the  button to add multiple converters. When you tap the button, a pop up window appears.
• Enter the number of converts in the Unit Count field.
• Select F, ¾, ½, ¼ (converter size)
• The units are now added to the Count Sheet.
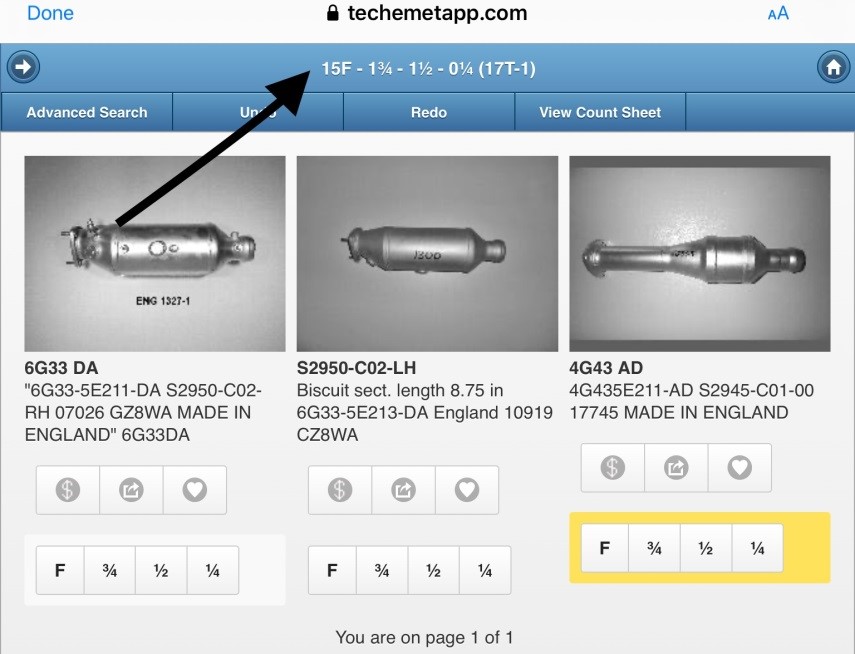
The number of units added and the size can be seen at the top of the page.
In the example above, the following converters were added:
15 - Full
1 – ¾
1 – ½
A total of 17 units were added.
The number 1 that appears next to the 17 T indicates that this is Sub Lot 1.
Warning Fields
If a value was entered in the Set Warning Count field when the Count Sheet was opened, the warning displays as follows:

In the above example the Set Warning Count field was set to 10. This means that once the count goes over 10 units, a warning appears at the top of the page. In the example above total number of units entered was 11. The Warning Count appears on the left hand side.
If a value was entered in the Set Warning Value field, when the Count Sheet was opened, the warning displays as follows:

The $ sign in a bubble indicates that the value that was set in the Create New Count Sheet screen has been exceeded.
Converter Search
This feature is used to search for converters using a full or partial serial number. For more information on this feature please refer to the Converter Search help file under the Help section.
Once the converter is found, please refer to the information above for instructions on how to add a converter.
Undo
The Undo tab at the tap of this page can be used to delete converters that were added to the Count Sheet.
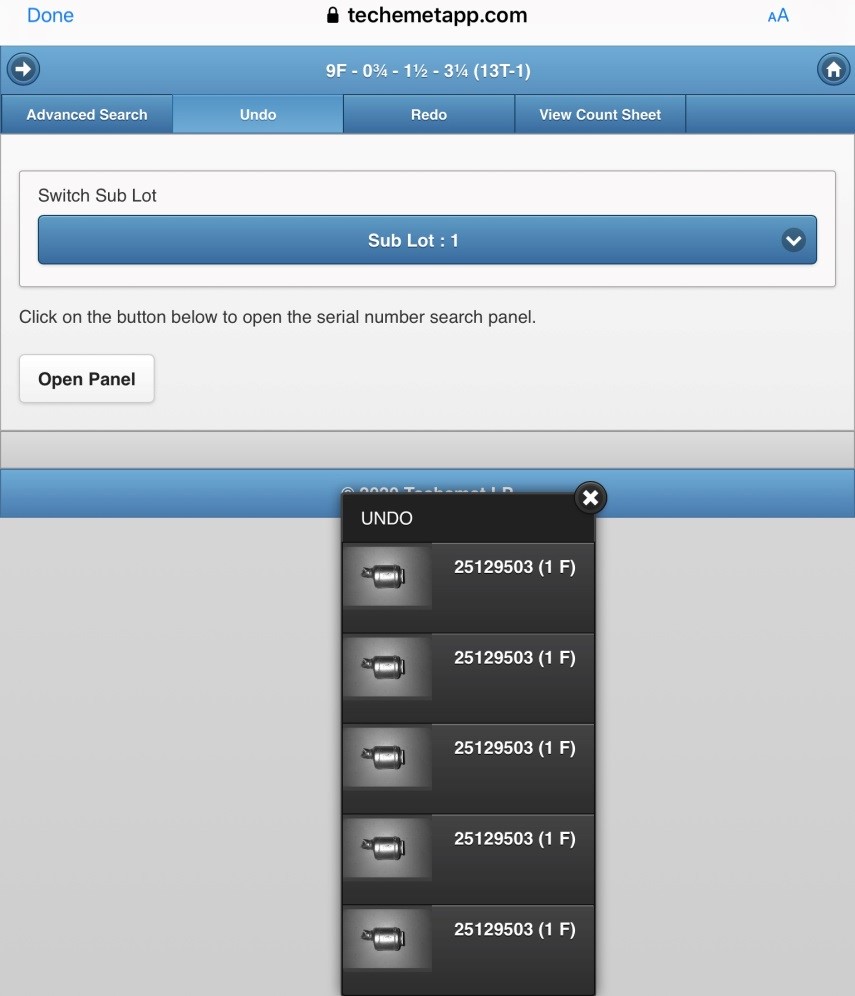
To undo an action or remove a converter from the Count Sheet:
Tap the Undo tab.
A list of converters appears.
Tap the converter you want to remove.
The converter is removed and the information at the top of the page changes accordingly.
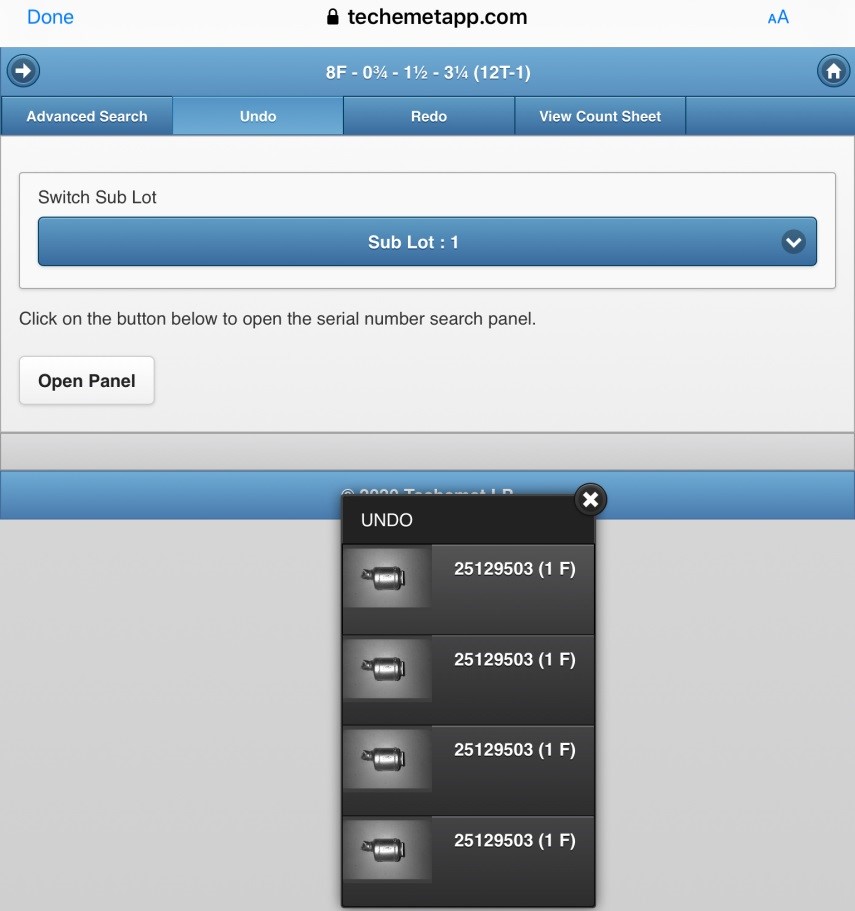
We removed a Full converter and the example above, shows that there are now 8 Full and a total of 12 converters.
Redo
The Redo tab at the tap of this page can be used to add converters that were already added to the Count Sheet.
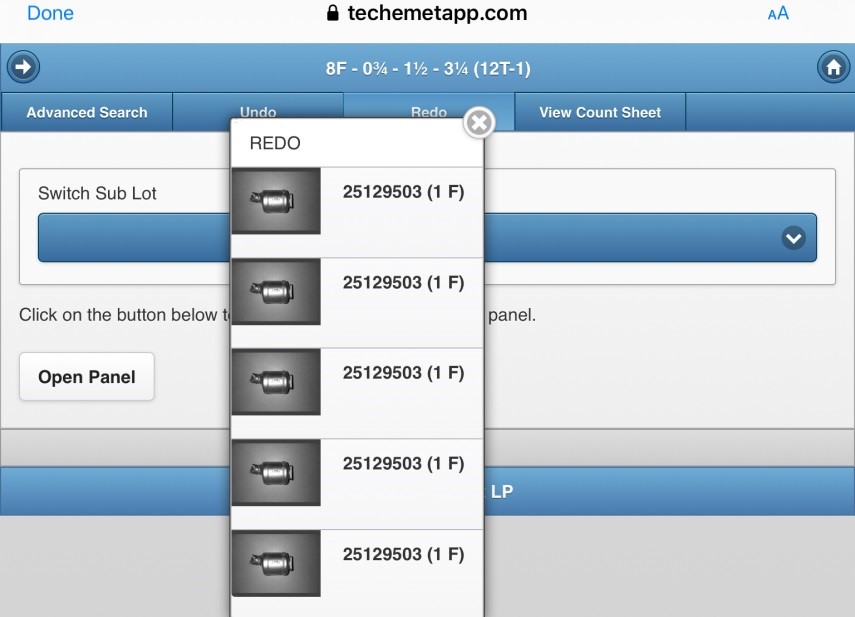
To add a converter that is already on this Count Sheet, tap the Redo tab.
The list of converters appears.
Tap the converter you would like to add.
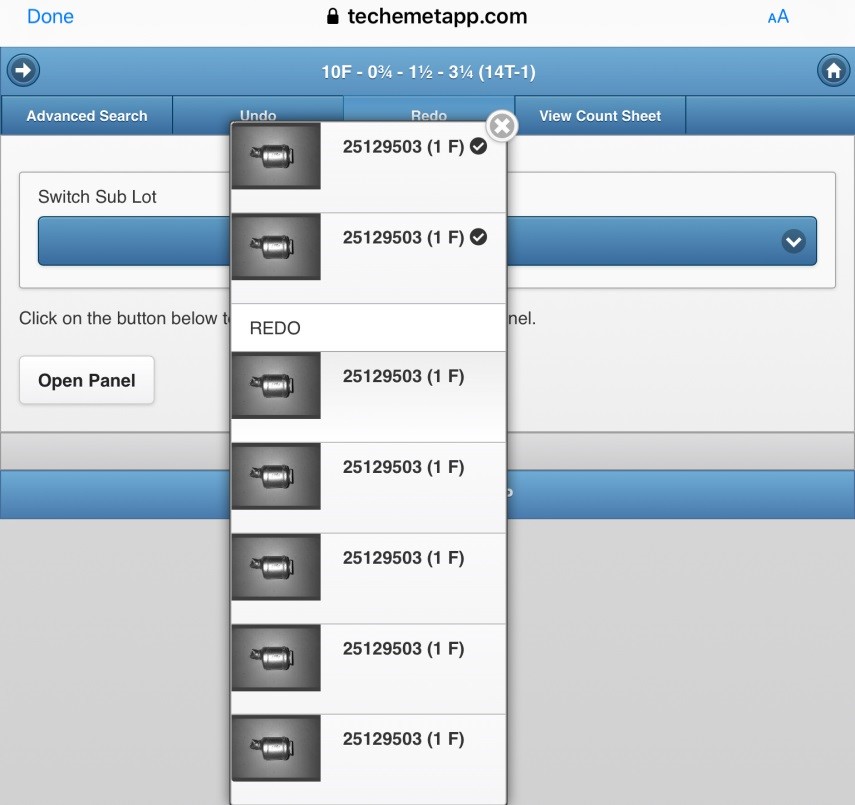
The converter you added moves to the top of the pop-up window, above the REDO heading.
Note that that we added 2 converters.
The totals at the top of the page changed.
There are now 10 F and a total of 14.
View Count Sheet
Tap View Count Sheet, to see the details of the Count Sheet.
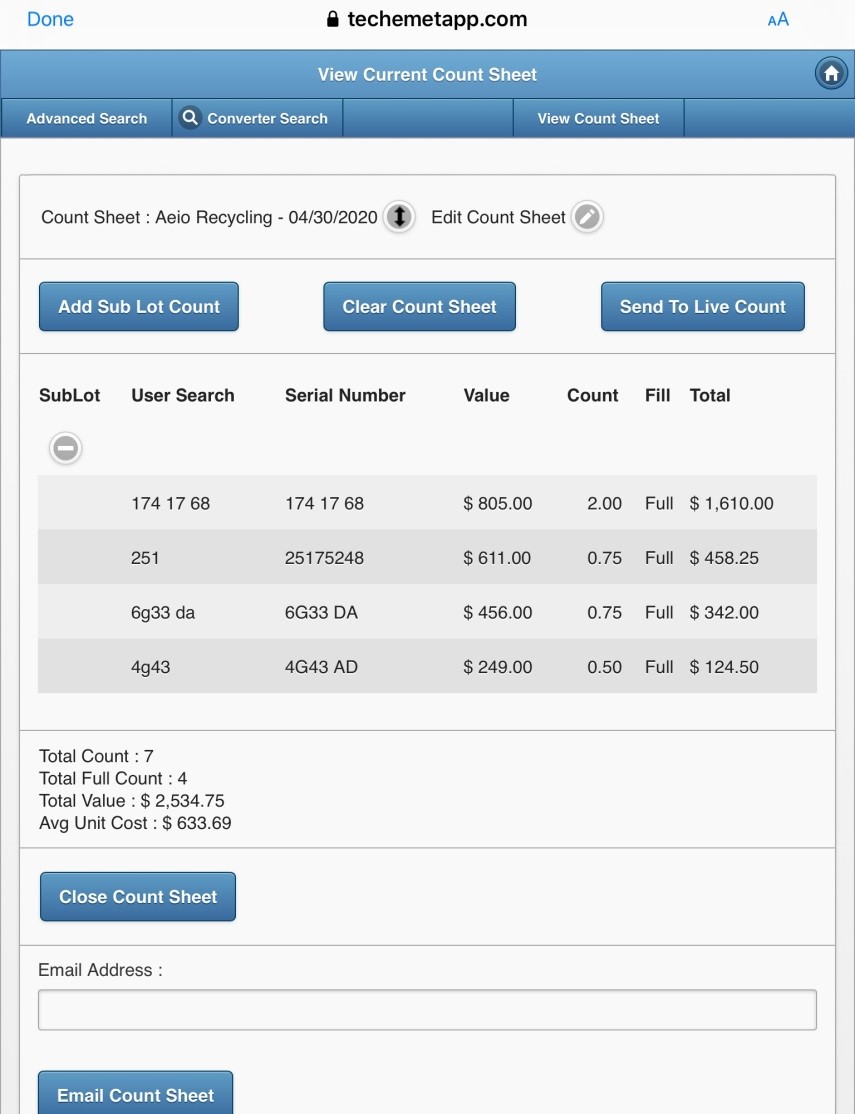
The page in the above example shows the number of units added. This is a condensed view of the page. The expanded view is discussed below.
This condensed view of the page shows the Serial Number, Value, Count, Fill and Total value of the converters added.
In the above example, Serial Number 6g33da was valued at $456* per unit and 0.75 units were added.
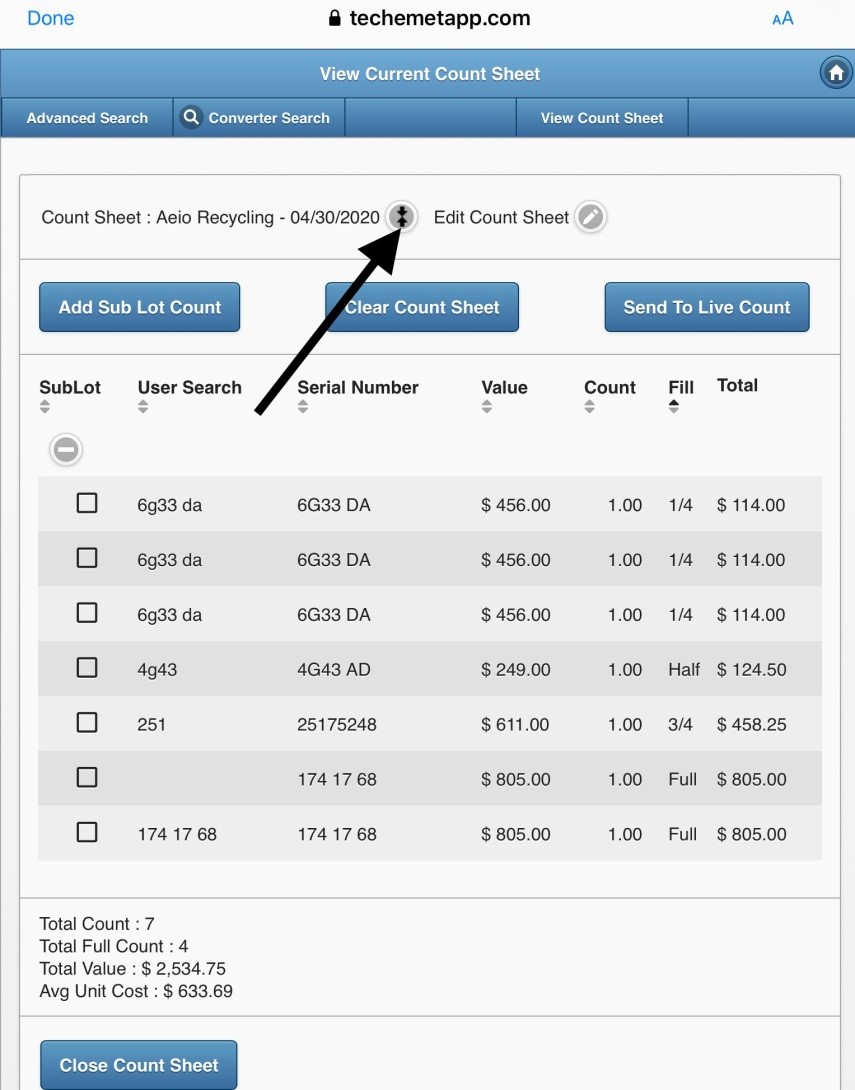
The above page shows the Count Sheet in expanded form.
To expand the Count Sheet, tap on the up/down arrow as indicated.
Converter Serial Number 6g33da is now shown line by line. Three of these converters were added at the 1/4l fill. ¼ of $456* = $114*, which is what each ¼ unit is show at in the Total column on the right-hand side.
*Please note that prices are market dependent and change with market fluctuations.
Close Count Sheet
Once all the converters have been added to the Count Sheet, you need to close the Count Sheet. Before closing the Count Sheet, note the following.
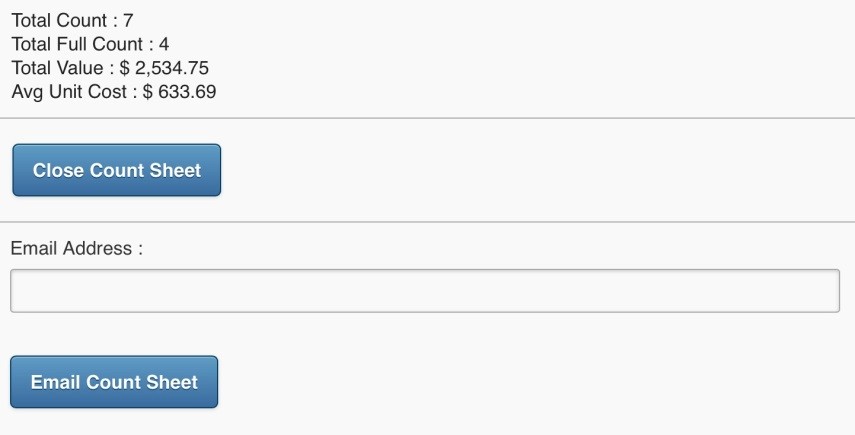
The bottom half of the Count Sheet provides information about the converters entered.
There is a total count, Total Full Count, Total Value and Avg Unit Cost.
If you are satisfied that everything is in order, close the Count Sheet, by tapping Close Count Sheet.
Please note that once the Count Sheet is closed it is NOT possible to add or remove converters from this Count Sheet.
Email Count Sheet – The Count Sheet can be emailed to multiple people if required. Use a comma between email addresses.
Other Fields On The Count Sheet
Sub Lot
You can set up Sub Lots on a Count Sheet.
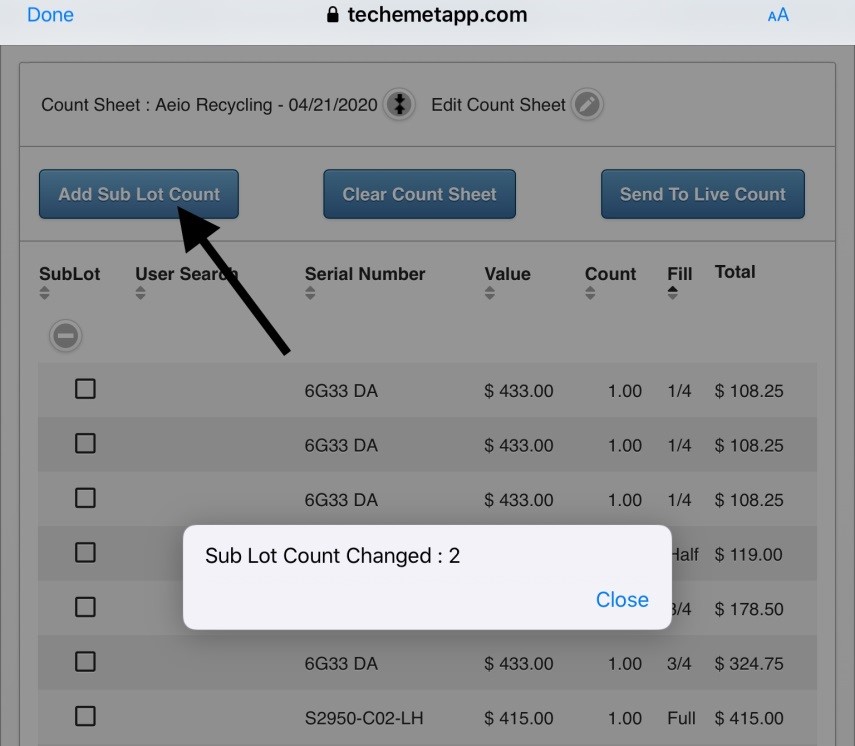
To do this, tap on Add Sub Lot Count.
A pop up window appears – Sub Lot Count Changed 2 – this means that there are now 2 Sub Lots on this Count Sheet.
Converters added to the count sheet now, will default into sub lot 2.

When you select Converter Search, the above screen appears. In the header, where the number of units and fill type are displayed, the information in parenthesis indicates the total units and the sub lot number. (10T-2) – 10 total units and units are now being added to Sub Lot 2.
The Sub Lot that converters are added to, can be changed on the Count Sheet screen or the Converter Search screen. These are discussed below.
• Change the Sub Lot on the Count Sheet Screen
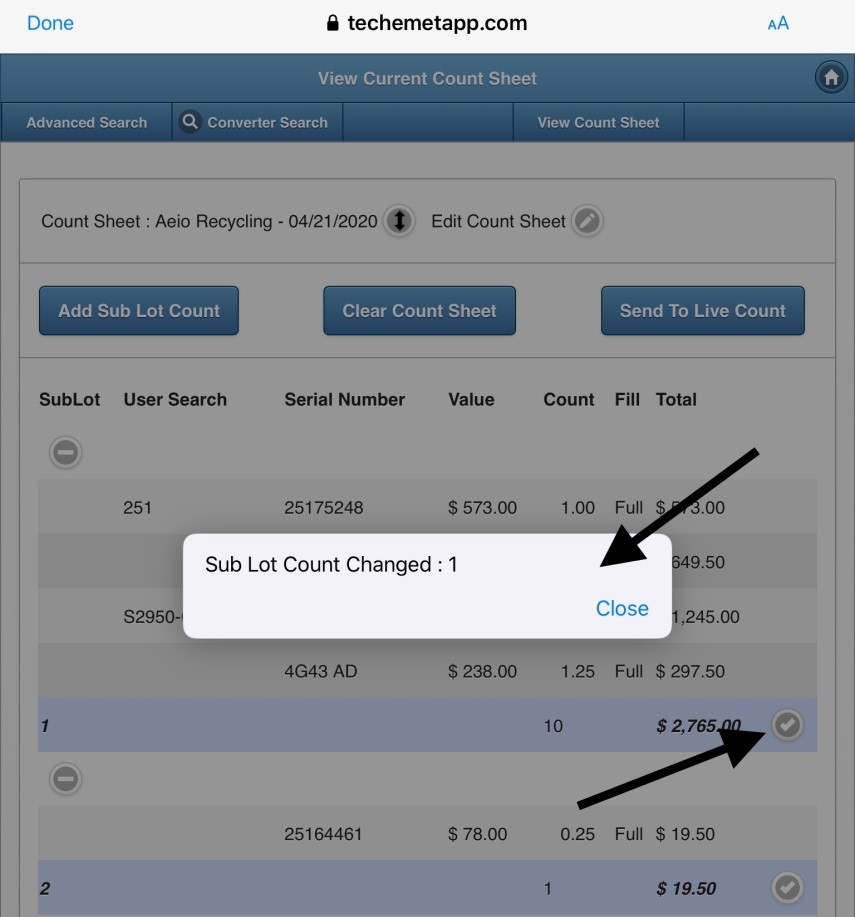
Tap the check mark next to the Sub Lot you want to change to.
A pop-up screen appears.
Tap Close.
The Sub Lot is now changed.
You can now used Advanced Search or Converter Search to add converters to the Sub Lot chosen.
• Change the Sub Lot on the Converter Search screen.
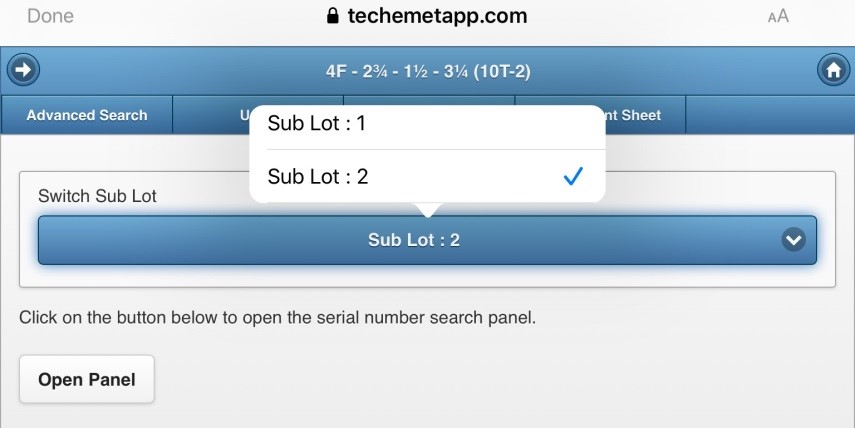
To switch between Sub Lots, tap Converter Search from the Count Sheet page.
The Converter Search page appears.
Tap on the blue bar.
A pop-up windown appears.
Select the Sub Lot.
If you are going to use the Advanced Search Function to add converters to a new Sub Lot, tap Converter Search from the Count Sheet page, change the Sub Lot and then tap Advanced Search.
Clear Count Sheet
The Clear Count Sheet button has a number of options:
Cancel – cancels the action
Clear All – all the converters are removed from the Count Sheet
Clear Selected – only the selected converters are removed.
To select converters to be removed, tap the up/down arrow to expand the Count Sheet.
Select the converters you want to remove.
Tap Clear Count Sheet.
A pop-up window appears.
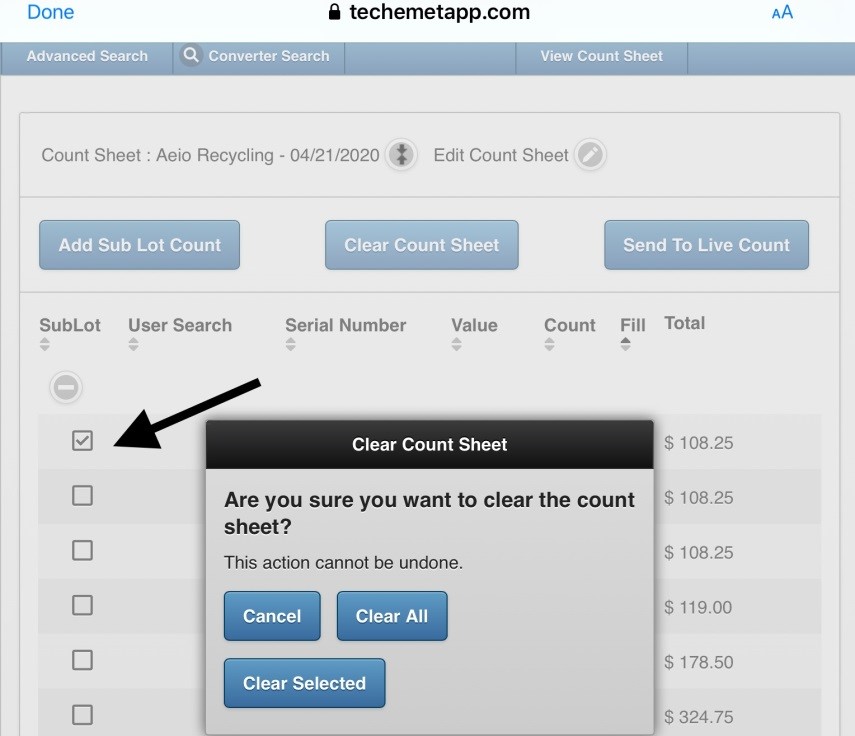
In the above example, the first converter listed has been selected.
Tap Clear Selected and the converter is removed from the Count Sheet.
Send to Live Count
When you tap this button, it expands the live count sheet that is being viewed. For more information on the Live Count Sheet please refer to the Allow Live Count Sheet View section of this document.
Allow Live Count Sheet View
When the user chooses this option during the Creat New Count Sheet process, the user receives an email with a url link. This link is used to view the Count Sheet live. The user can send this link to the person(s) who would like to view the Count Sheet process live.
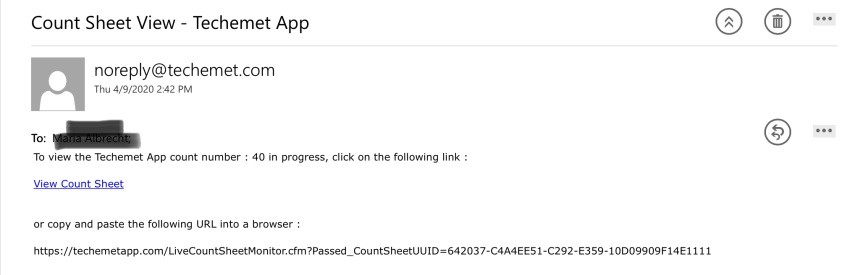
Once the recipient taps on the url, they can view the Count Sheet live. An example is shown below.
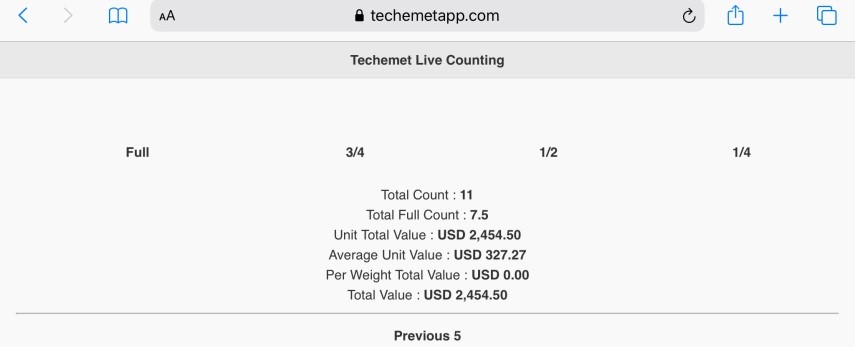
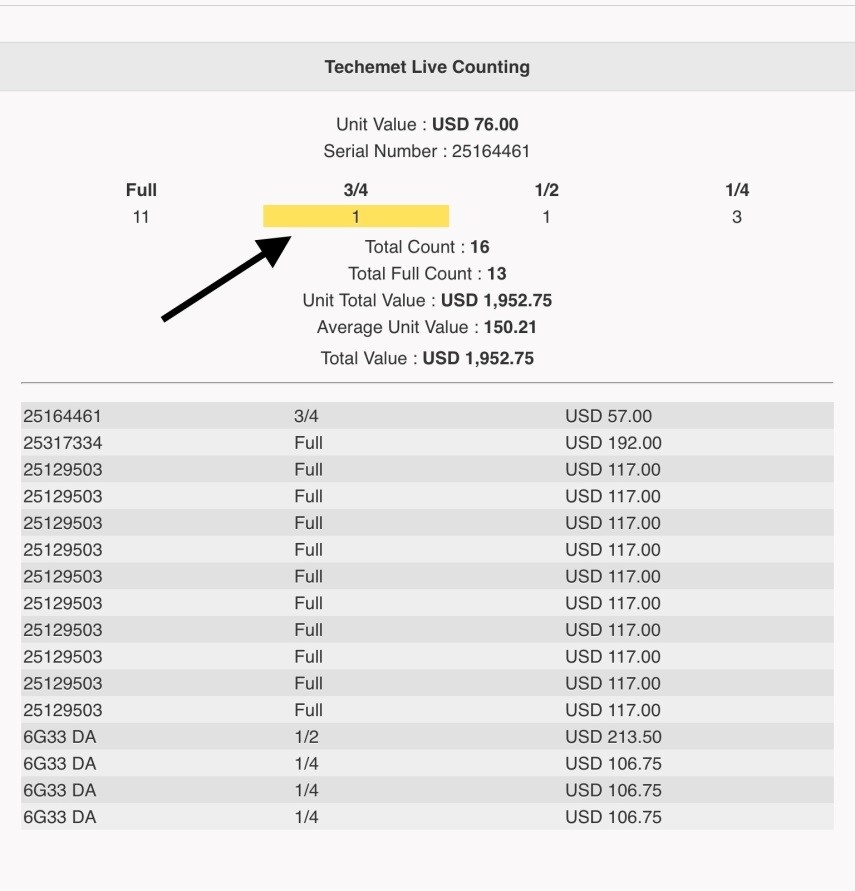
As converters are added, the Count Sheet is updated on the viewer’s screen. Changes are highlighted.
While the Count Sheet is open, there is an option to email the Live Count Sheet Link on the main menu.
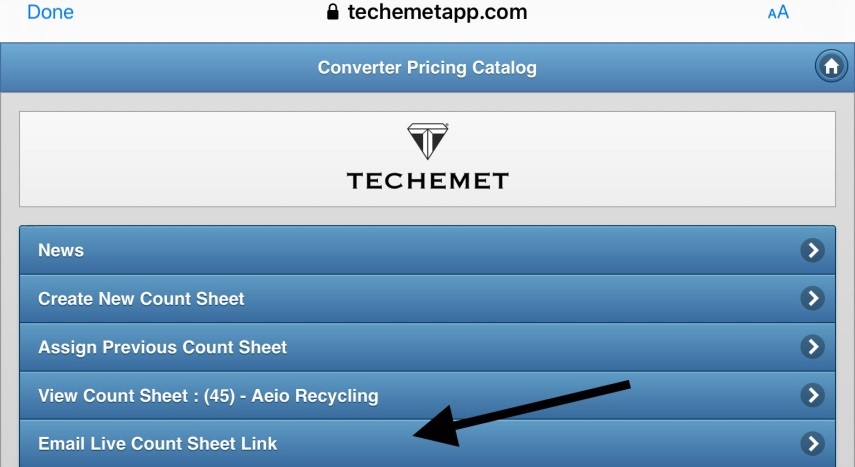
Tap the Email Live Count Sheet Link to email the link to the person who wants to view the count sheet.
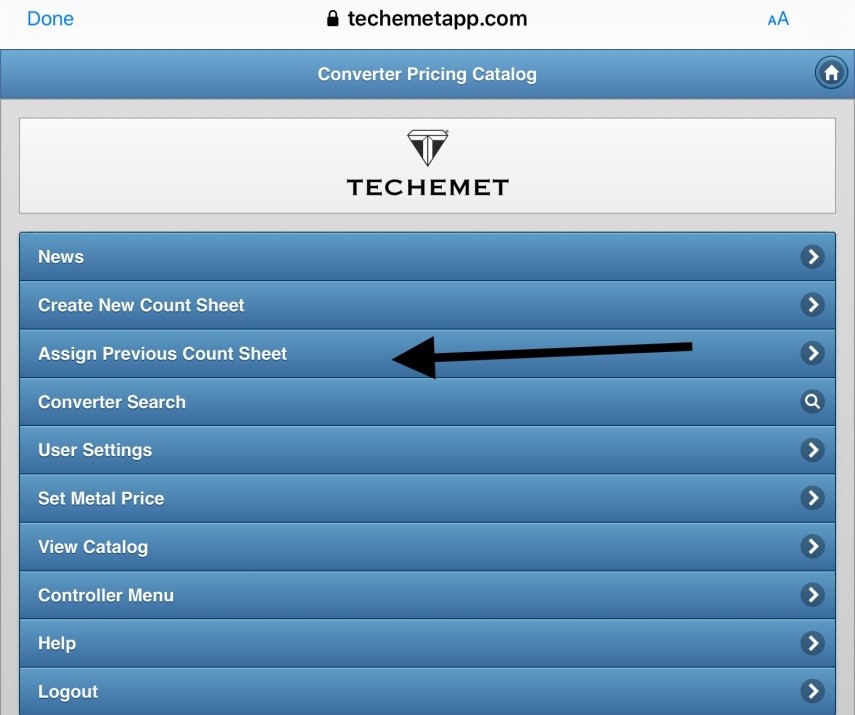
Assign Previous Count Sheet
To work on a Count Sheet that was opened previously AND has not been closed, it is possible to open/assign a previous Count Sheet.
Tap on Assign Previous Count Sheet from the Main Menu.
The Open Previous Count Sheet screen appears.
Tap on the down arrow in the Select Previous Count Sheet Details field.
A drop down menu appears.
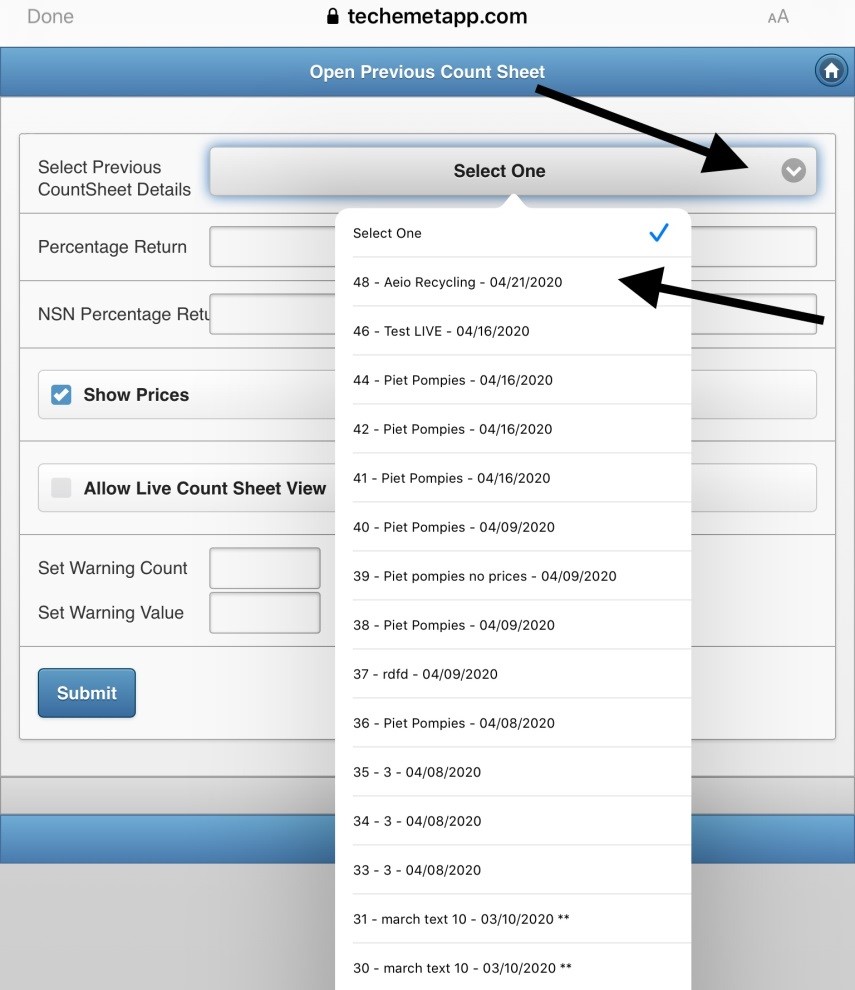
Select the Count Sheet you want to work on.
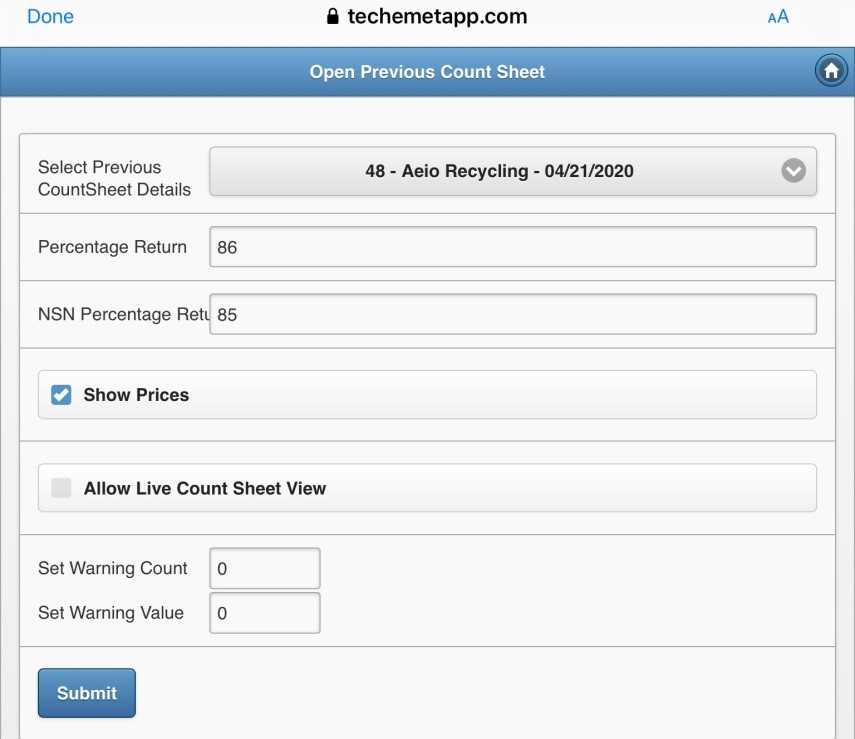
The Count Sheet appears.
Changes can be made to the fields on this screen. Please refer to the Create New Count Sheet section for more information.
Once the changes (if any) have been made, tap Submit.
The Main Menu appears.
The Count Sheet name that was assigned/ opened appears in the View Count Sheet field.
Tap on the View Count Sheet field to view the Count Sheet. Please refer to the Create New Count Sheet section for more information.
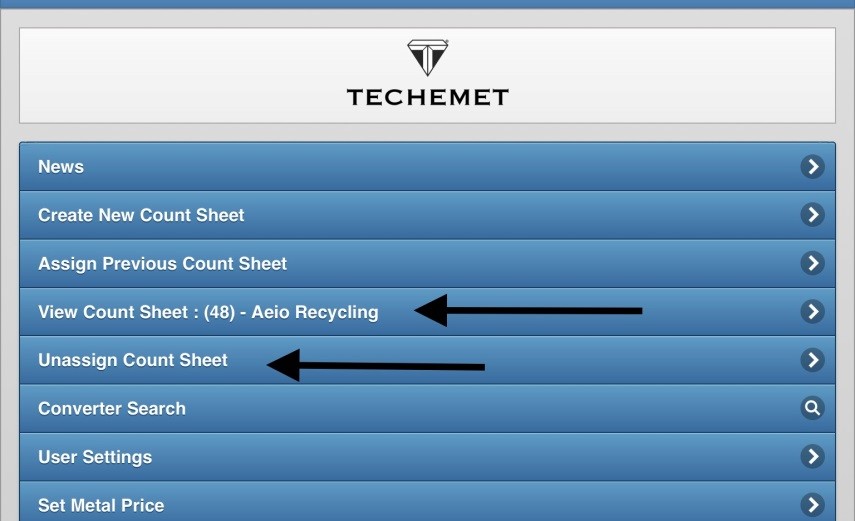
Unassign Count Sheet
Tap on this to remove the Count Sheet from the View Count Sheet field on the Main Menu. This action sends the Count Sheet back to the Previous Count Sheet section.